The Book of Installing Glue In’s
“If the hole isn’t clean, it can be really risky!”


The Bolting Bible
This is free resource by HowNOT2 and our way of contributing to the community. It's nice to understand what you are clipping and trusting with your life, even if you never plan on installing or removing bolts. We also believe that if you are going to spend time and money to bolt something, you should do it well.
This book is in a blog format. This page points to all 17 chapters, and the end of each chapter points to the next.
A downloadable PDF is available HERE.
Take it Serious

If you have the right bolt and the right glue and the right stoke, you can still screw (or glue, get it?), this up and kill someone. You don’t have to be a nuclear physicist to install a glue in bolt, but you DO have to do the simple instructions or you can kill someone. Let’s emphasize the killing someone real quick. This isn’t about long term vs short term anchors. We are talking about them coming out, AKA killing someone if they don’t get put in correctly.

TOOL LIST
- Bolts, duh! The softer the rock, the longer you want your bolt.
-
Glue cartridge + Dispenser ...OR Capsules
- Spare mixing tips and extension tips
- NOTE: 10oz fills roughly 10 ½” holes but if you have to change out mixing tips often, you lose quite a bit each time you change one.
- Knife
- Drill, and correct size bit, plus spare bits
- Safety goggles
- Face mask - rock dust isn’t good for you.
- Ear plugs if drilling a lot
- Pipe cleaner and blow pump (for really clean holes!)
- Rubber gloves and paper towels! It can get messy.
- Tape for a perimeter around notch so it doesn’t ooze everywhere AND for making a depth marker on your drill bit.
- Cotton swabs for detailing in case it oozes out a lot
- Bag for garbage
- Bag for testing mixture (see “Filling Hole” below)
- Plastic or covered Hammer (For bolts with a tight fit)
- Rubber hammer for tight fitting glue in bolts
- Heart full of stoke and a car full of friends!
- Bag to go on your harness for installs in the vertical world

TRAINING and PREPARATION

Please please don’t let your first glue in bolt be anywhere important. Do several in your backyard or your parents backyard or the backyard of someone you don’t like when they are out of town (kidding! Just kidding! Jeez).

If you think that would be an eyesore, now you know how all the whiners feel that complain about
over bolting. You can read this Glue In Section 100x, but you will always have kinks to work
out, and kinky stuff should be done at home.
Practice also helps you verify you have the right drill type, bit type, bit size, glue
accessories, amount of glue, cleaning tools AND TECHNIQUE. Or... you can just wing it and go
learn in a popular area, but just make sure you put your name on it so we know who to troll!
Can you answer the following questions about what is in your bolt kit bag?
-
What are the min and max cure temperatures?
- What temperature will it be when I install these?
- Can the glue even be installed at the installation temperature?
-
What is the nozzle time? (how long can it sit in nozzle before you have to put a new one on)
- Do I have spare nozzles
- Do I have spare extension tips to get the glue in the back of the hole?
- What is the working time so I don’t ruin the bond before it is cured?
- Will this glue run out of a hole if I put it in horizontal or in an overhanging rock?
-
What is the cure time for low, medium and high temps?
- When do I plan on climbing or highlining on these bolts?
- Did I charge my batteries for my drill? Do I have spare batteries?
- How deep do I need to drill, and will I need a notch?
- Do I have a way to keep things clean and tidy?
- How many holes can I fill up with one tube?
- Do I have the right bolt for my glue capsule (angled end for screw install and blunt end for hammer install!)
- How am I going to put warnings on my bolt if it requires several hours to cure so no one uses them after I leave?
- Does the fluid move in my glue capsules?
- How long has my glue cartridge sat on my shelf?
- Do I have the proper pipe cleaner and blower to get a really clean hole?
DRILL HOLE


Some glue ins require a notch so the bolt is inset a bit. To make a notch for a bolt you have 3 options. Drill a ½” deep hole about an inch or so away from hole and then tilt the drill bit 45 degrees towards the main hole. OR stick the drill bit inside the main hole and tilt it a lot and drill away from the hole. OR drill 3 straight down holes, ½” deep, next to your main hole.


TIP: Use a smaller drill bit to notch. This way it barely fits and thus has a much smaller glue profile, assuming you use duct tape to minimize the ooze.
CLEAN HOLE

This is a huge fear when an experienced bolter hears a new bolter is stoked to go install glue ins. If the holes aren’t cleaned really really well, someone could very likely die. Really clean it! That requires a pipe cleaner AND a blow tool. A blow tube and your lungs aren’t enough, even if you are really good at blowing so get a dust blower like this pump, or Hilti's pump.

A can of air also can do 20 to 30 holes and is light. A Battery Powered blower compatible with
your drill battery can also be a gamer changer. A wire brush tube/pipe cleaner can be bought
from anywhere. Regardless of how rough or porous the rock is, drilling a hole polishes the sides
of the hole, so in order to get the glue to bond with the rock (which in case you don’t know,
that is important, and if you don’t know that, please don’t put any of these in), the rock can’t
have any dust film on the sides. Do a fun experiment at home, put super fine construction dust
on your granite countertops at home, then try blowing them clean… blow hard… even with an air
compressor you can’t get it truly clean.
Same with the wire brush, you can’t JUST use the brush. Blow then brush, again and again and
again until it is super clean. Always start with the blow.


 Update: Vynlester is more susceptible to coming out when the hole is not clean. After many tests
with epoxy in BoltBusters, the bolt failed first or the bolt pulled out of the hole, leaving the
glue in the hole. Glue does NOT stick to the metal, so much so that the twist bolts from
BoltProducts will untwist out of the hole when pulling straight out (at insanely high forces) but
the glue will stay in the hole. We got epoxy to fail but only with threaded rod shafts because the
threaded rod holds the glue really well. It also took a super dirty holes and we pulled it straight
out and at 10,000lbs or 44kn as you can see in this
EPISODE.
Update: Vynlester is more susceptible to coming out when the hole is not clean. After many tests
with epoxy in BoltBusters, the bolt failed first or the bolt pulled out of the hole, leaving the
glue in the hole. Glue does NOT stick to the metal, so much so that the twist bolts from
BoltProducts will untwist out of the hole when pulling straight out (at insanely high forces) but
the glue will stay in the hole. We got epoxy to fail but only with threaded rod shafts because the
threaded rod holds the glue really well. It also took a super dirty holes and we pulled it straight
out and at 10,000lbs or 44kn as you can see in this
EPISODE.

Another reason to use epoxy! BoltProduct’s test of a 10kn failure with a dirty hole compared to a 34kn failure with a clean hole was with polyester - the cheapest and weakest of glues. Regardless, STILL CLEAN YOUR HOLES for whatever glue you use but it’s nice to know we can be nicer to people who didn’t do it perfectly.
If you don't have the brush or tube to clean it really well and you are mid-install here is a tip: Fill the hole 1/3rd the way up with glue, stick the bolt in it and more or less f*** the hole aggressively. You can mix the glue with the dust and work the glue onto the sides of the hole so there is solid contact. Pull out the bolt, fill it up to the proper amount and put the well covered shaft back in the hole and you have super good enough contact with both the rock and the bolt.
TEST AND CHECK

INSERT GLUE

Part B of glue wasn't mixed in, came out at 0kN
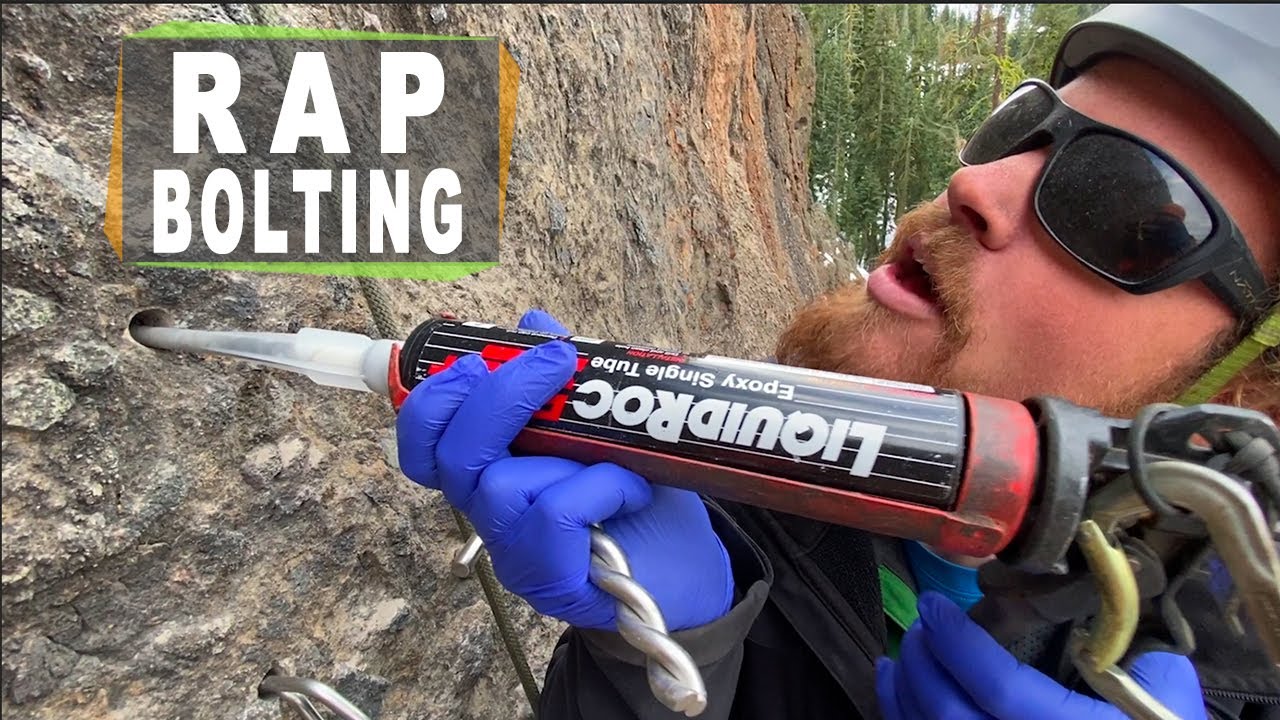
CARTRIDGE: If you’re 100% ready to start, cut your glue cartridge open, squeeze just a bit
without the nozzle to see that both colors are coming out, then install the mixing nozzle. But…
before you start shoving your tip inside of holes, make sure what’s “coming” out is safe! You
can’t just put the first squeeze into the hole. This is one of the main reasons you will want
paper towels. Squeeze a COUPLE times to make sure it is mixed properly, which you can generally
tell by the color.
THEN grab a ziplock bag and squeeze a quarter size amount into the corner. Only after all that…
start putting it in the hole. This ziplock bag is so you can check later to make sure your first
squeeze of glue hardened.

Jim Titt from bolt-products.com said in a Mountain Project thread “over a period of 7 years the DAV recorded 17 failed resin bolts… one climber died.” VERY IMPORTANT… Start in the back of the hole and work your way out. Don’t fill it up to the very top because the bolt will push out the amount of space it replaces.


HAMMER CAPSULES: Spin the capsule around a couple times to make sure all the resin is in liquid form because if it isn’t it won’t mix correctly. You are literally shoving harder around it so it has to be liquid. Insert with the hardener facing up. If you think of it like a cigarette, then what looks like the filter, is closest to the top of the hole. That is the hardener and if it isn’t at the top you aren’t going to be mixing anything. The capsules are glass and you are smashing a bolt through it, so wear safety goggles. Your bolt has to have a flat/blunt end. A tapered end won’t push the hardener down into the resin. Make sure you have the right size capsule because if it is a ½” capsule in a ⅝” hole, then it will be leaning to one side not mixing things evenly, and you probably won’t have enough glue to fill up your hole!
SPIN INSTALL CAPSULES: Spin the capsule around a couple times to make sure all the resin is in liquid form because it if isn’t, it won’t mix correctly. These spin installs have a glass container inside of another glass container. One has resin (the amber liquid) and the other has hardener. There are sand chunks in these so it scores sides of the hole and helps mix the glue. These capsules (at least from Petzl) require that they stick out of the hole by 10mm so you can break the glass with the hammer, then insert the bolt. These bolts must be angled on the bottom in order to mix these correctly which is different from the hammer capsules. Now to do this properly, the spinning requires mechanical spinning, and there are special adapters for your drill that you can attach the bolt and spin it. Petzl system is to manually spin the bolts in their instructional videos, but I don’t believe that is how they should be used. They say to spin the bolt 10x. That doesn’t mean 10 turns with your hand, that means 10 full rotations which is more like 20 times with your hand. If you use this system, spin them like your life depends on them. This system obviously doesn’t work for wave bolts because they can’t be spun as they fit tightly in the hole.
INSERT BOLTS

If using a threaded rod, squirt a bead of glue along the threads before putting it in. For the bolts that don’t require hammers to install, like Bolt-Product solid legs, Petzl and Fixe bell shape or PLX, you will want to slowly push them in and TWIST them while you do it. Fixe bolts have a weld, and you want that weld facing away from force, even if it is buried under the glue. You don’t want air pockets around notches or threads. If you hear air bubbles gurgling as you push in bolt then you don’t have glue in the back of your hole!!! No bolt queefing! Pull out the bolt and make sure the hole is super full of glue.

If you are using Wave bolts, Titans, or Twist bolts, then you need a hammer, but you don’t want to hit a stainless steel or titanium bolt with a non stainless or non titanium hammer.

Since that would be one expensive, fancy hammer, you can use the wave bolt installation tool that is made from stainless and it puts the force on the right parts of the bolt, OR use a rubber mallet, or plastic hammer, or just put a rag between the two metals.

The point is, your hammer will transfer iron onto your fancy expensive bolts and those iron particles will start rusting making your fancy bolt look like it is corroding (this picture with rust on a wave bolt is from this MP Thread).
Keep in mind, the Wave bolt will twist as you hammer it, requiring you to hit it sideways to orientate it correctly, not sure if that is good for the bolt or the glue but people do it. One option is to drill the hole bigger for the Wave Bolt, you will lose the tight fit, but you don’t need that unless you’re installing it in an overhang.
Orientation

Upside down is wrong
P shaped bolts are intended to be installed with the P facing down - towards the direction of pull. If you install it facing up like in this photo, it isn't as strong and enough whippers could start to bend it backwards. Also notice how messy this glue job is. The gray color matches the rock well at least. We pulled some backwards Monster Crux bolts (a welded P, not a continuous rod) and it bent back at 20kN and broke at 21kN where as installed proper it broke at 50+kN. P bolts are stronger when the P sits on the rock to stabilize it from bending.
FINISHING TOUCHES

Troubleshooting


-
Why doesn’t my glue come out the right color???
-
Well, that’s probably because both parts aren’t coming out! Single cartridges may not be evenly dispensing like the image below, or one of your dual cartridges have ruptured like the image with the messy Hilti gun. Get a new cartridge and start over.

-
-
Ah shucks, I drilled the notch too deep and now the eye is recessed too much, how do I fix it???
- Just put a piece of gravel, small pebble or something non dusty in the bottom of the hole or in the notch, if it will stay, to prop up the bolt until it cures into the position it will be forever.
-
I just heard my bolt hole fart. Does it have enough glue?
- If air comes out as you put in the bolt, it does NOT have sufficient glue!
-
I hammered in my glue in and it won’t go all the way in
- Wave bolts can feel so tight that it is hard to get them all the way in. Lightly wallow out the hole so it isn’t so tight, it does NOT need to be tight to work.
- The other possibility is you didn’t drill the hole deep enough. Take bolt out and redo it. It will be a royal mess!
-
My bolt is on a steep rock and keeps slowly sliding out!
- Tape it to the rock or worse case wedge a tiny pebble or stick between the rock and the bolt shaft to hold it in place, but be sure your wedge is below the surface of the glue so it doesn’t look sketchy later.
How NOT to Bolt
I couldn’t believe how many “How to” videos had mistakes in them. What a shock that youtube videos are not 100% factual!!! Here is a list of instructional videos we found online and some feedback on their technique.-
This video is actually pretty good. They properly install a spin type capsule. If I am going to overly picky, he doesn’t blow his hole out after brushing it and he left too much gluesticking out, so his plate didn’t sit flush. What is interesting about this video is that it shows that this is how spin capsules are supposed to be installed, whereas climbers don’t do this.

- This video is another good one, but he doesn’t wear safety goggles. And I’m not just getting on a high horse here as I’ve been hit in the eye before! And it blows dust into his face. I like the fact he uses a proper blow tool. He doesn’t bury the eye which is one of the few instructions Fixe does require! I like that he mentions the hammer leaves iron deposits, so he uses a rubber mallet. I don’t like the fact this is only manually spun to mix the glue, and I’m not excited he keeps pulling it in and out. Is that glue surrounding the shaft entirely or is he getting air pockets doing that?
-
This video here is ok. He only vacuums out the holes which does almost nothing for the dust on the sides of the hole and doesn’t brush them, which for the polyester glue he is using, reduces the strength he could get by half.

- This video is the same as number 3, but uses a cartridge instead of capsule. He vacuums his hole again and doesn’t brush it, and he should put a little glue on the threaded rod before inserting it into hole. You don’t want any air pockets around your threads, he definitely has some air pockets on his.
- This video is pretty good but doesn’t use a wire pipe brush and just hoses out the hole, which is technically fine for epoxy. He also makes a mess which is ok for what he is doing, but not if he did it on rock.
- This video here is the winner! HOW NOT TO BOLT!!! By Hilti themselves! Installs glue in a dirty hole. He seriously pushes the dust out as he fills the hole with glue!!! The video doesn’t explicitly say it is the SafeSet Technology which is the only exception. That Hilti system can be used without cleaning the hole. This requires a special bolt shaped in a special way and made with a materials that won’t allow the glue to stick to bolt, so when it trys to come out, the HIT-Z bolt flanges on bottom expand the glue like a wedge bolt does to the clip. These bolts are only zinc plated, and no one uses these for climbing applications. The system also requires the HIT-HY 200 glue and not just any epoxy. This video should specify that it is only that unique system.
- This video is by the Access Fund and they did a great video but it has some flaws. He talks about a clean hole, but only cleans it one time. It should be 3x or 4x. He talks about pumping the first squeezes out to make sure the color looks right so the mix is right, but doesn’t do it on camera. He talks about not hitting it directly with a hammer, then does it at the end to twist it into position.
- A GOOD EXAMPLE… OK, I lied, there was one video by Powers that gets a pat on the back. They clean the shit out of the hole and they pre-squeeze a lot of glue out before putting it in the hole. Look at how much dust comes out on their second phase of blowing it out! And look at the color change as they squeeze out the initial glue. Great example!
-
Another Good Example… Climbtech put out a good video in a real life climbing situation. They had fancy tools for hanging situations. They were able to reuse the hole from a bolt they removed, and the wave bolt fit in nicely. It wasn’t super tight, but tight enough to hold, which is perfect.

- Another good example - teamBMC youtube channel had a good video on how to check glue in bolts.
- Another good example - Derek Bristol has a channel on caving and made a good video about installing glue ins. He also has a good video on Fixe Triplex Removables.
- David Keller made a video for us for his project. He did very good on the details. He regrets using such sharp pebbles to hide the glue and would just use dust next time. Backward P installs turned out not to be as strong in our testing because the weld right where it is leveraged. However, we are talking 20kn instead of 60kn so super good enough.
- In this EPISODE, we installed bolts for the GGBY spacenet. We really struggled when we put some in the slightly overhanging wall for a hand line and the bolt wanted to slip out. It took a lot of duct tape to hold it in place.
What's Next?

Chapter #12 - The Book of Pulling Out